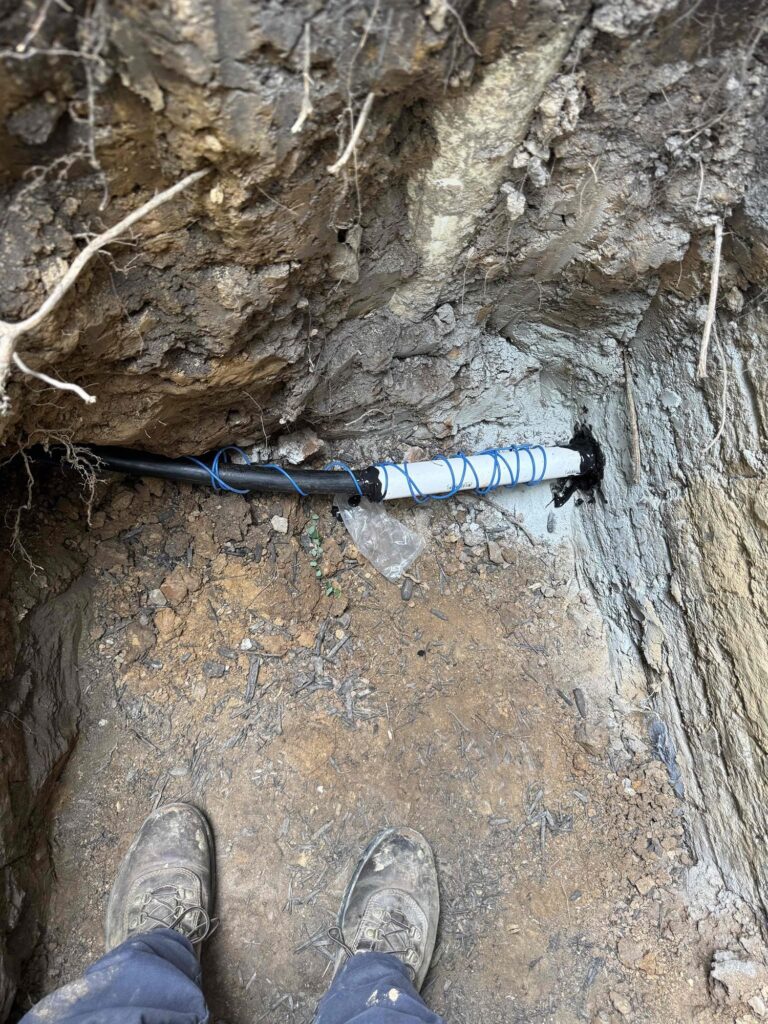


Sewer work is the most expensive plumbing most people will ever buy, and it arrives with the least explanation. Somebody hands you a five-figure number for a pipe you’ve never seen. This is the honest shape of it: what each option costs, what the ranges actually look like here, and the one thing that has to happen before anybody quotes you anything.
If the no-dig repair is the part you came for, we have a page on just that: how trenchless sewer lining works, what it costs against digging, and the four situations where we’ll still tell you the line has to come up. City by city, we go deeper on sewer repair in McLean, Woodbridge and Prince William, and Loudoun County.
The short answer
In Northern Virginia, the usual ranges:
- Camera down the main, while we’re already there: $89.
- Camera visit on its own: most run $500 to $620.
- Clearing a blocked main line: $550 to $1,650, with the middle near $1,100.
- Trenchless repair, lining the pipe from the inside: quoted off the camera footage. For scale, the trade’s national average on a short spot repair runs about $3,800.
- Digging the line up and replacing it: digging and replacing generally runs $7,500 to $9,000.
Nobody should quote you a sewer job without a camera in the line
Be suspicious of anyone who tries. A camera is the cheapest part of the whole process and it decides everything after it.
It answers four questions, and every one of them moves the price:
- What’s actually wrong. Roots at a joint, a crack, a belly where waste pools, a full collapse, or just a blockage sitting on perfectly sound pipe. Those are four different invoices.
- Where it is. The camera head carries a transmitter, so the fault gets located and marked on the ground above it. Fifteen feet off the house is a different job from sixty feet out under the driveway.
- How deep. Depth drives excavation cost harder than length does.
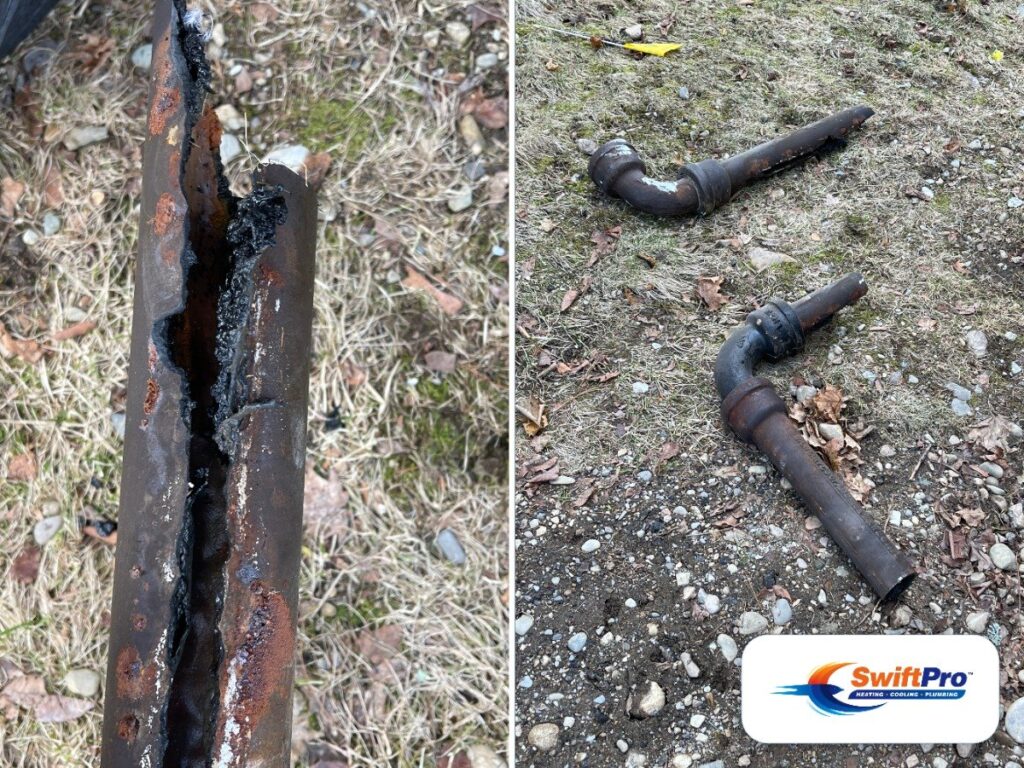
- What the pipe is made of. Clay, cast iron, Orangeburg and PVC each fail differently, and each one changes what can be done about it.
Those four answers are what turn a five-figure guess into a scoped job. They are also what decides whether you need the expensive option at all, which is the part that matters to you and regularly costs us the bigger sale.
One thing worth knowing before you watch the footage: not every defect is a repair. Seattle’s utility publishes the thresholds plainly, and they’re a reasonable way to read your own video. A sag holding less than a quarter of the pipe’s diameter is minor and gets left alone. A quarter to a half will collect debris and is worth re-inspecting every couple of years. Half or more is the one to fix. The same reading applies to roots. So if someone points at a camera screen and says the line is bad, the fair question back is: bad how, and what percentage of the pipe.
Your four options, cheapest first
Most homeowners think this is a yes-or-no question: replace the sewer or don’t. It isn’t. There are four rungs, and the camera tells us which one you’re actually on.
1. Clear it
A cable or a jetter opens the line. If the camera then shows sound pipe behind the blockage, you’re done, and you spent about $1,100. Roots that grew in through a joint will come back on their own schedule, usually one to three years, so this is a real fix for a real problem and not a permanent one.
2. Line the bad section (trenchless spot repair)
A resin-impregnated fiberglass sleeve goes in through the existing pipe, gets pushed to the fault, inflated against the old wall and cured in place. It becomes a new pipe inside the old one across that section. Nothing gets dug. Repair lengths are typically 5, 10 or 20 feet, and the cure itself takes 5 to 15 minutes.
This is the rung most people have never been offered, and it’s the one that saves the most money when it fits. In-Line Renewal Solutions, which supplies UV lining systems to plumbing contractors, puts the national average sale price of a four to eight-foot spot repair at about $3,800. That’s their number for the trade, not our price list, but it’s the right order of magnitude, and it’s roughly half of what the same fault costs to dig.
3. Line the whole run
Same idea, full length. A continuous liner is cast through the entire lateral, up to about 150 feet, and it will navigate 45 and 90-degree bends on the way. You get a new pipe end to end without a trench, and the lawn, the driveway and the mature oak all stay exactly where they are.
4. Dig it up and replace it
Open the ground, take the old pipe out, put new pipe in. Still the right answer sometimes, and we’ll say so when it is. Generally $7,500 to $9,000.
What trenchless actually is, in plain terms
The version people picture, big machines and a torn-up street, is the municipal version. The residential version is quieter than that.
A liner is a fiberglass sleeve that arrives already saturated with resin. It goes into your existing pipe through a cleanout, gets positioned across the damage, and then a light train inside it cures the resin with UV. Not heat, not a chemical anybody has to mix on site. The resin only hardens when that specific light hits it, which means the crew controls exactly when the clock starts instead of racing a pot life.
The working details that matter to you:
- It works on pipe from 2 inches to 12 inches, and on host pipe of any material. Clay, cast iron, Orangeburg, PVC.
- The cure runs 5 to 15 minutes depending on the length and diameter. The visit is a day, not a week.
- The resins are non-VOC, so there’s no solvent smell through the house while it cures.
- The liner material is specified to exceed the structural requirements of ASTM F1216, the standard practice for rehabilitating pipe with a cured-in-place liner. It’s a structural pipe, not a coating.
- The design life is 50 years, and that isn’t a brochure number. ASTM F1216 specifies a 50-year stand-alone design life, and an EPA-funded retrospective that pulled liner samples out of municipal sewers after 21 to 25 years in service found them in excellent condition, with no reason to expect they won’t go the distance.
The honest summary: you’re getting a new pipe. You’re just not getting a new trench.
What a lining job actually looks like, start to finish
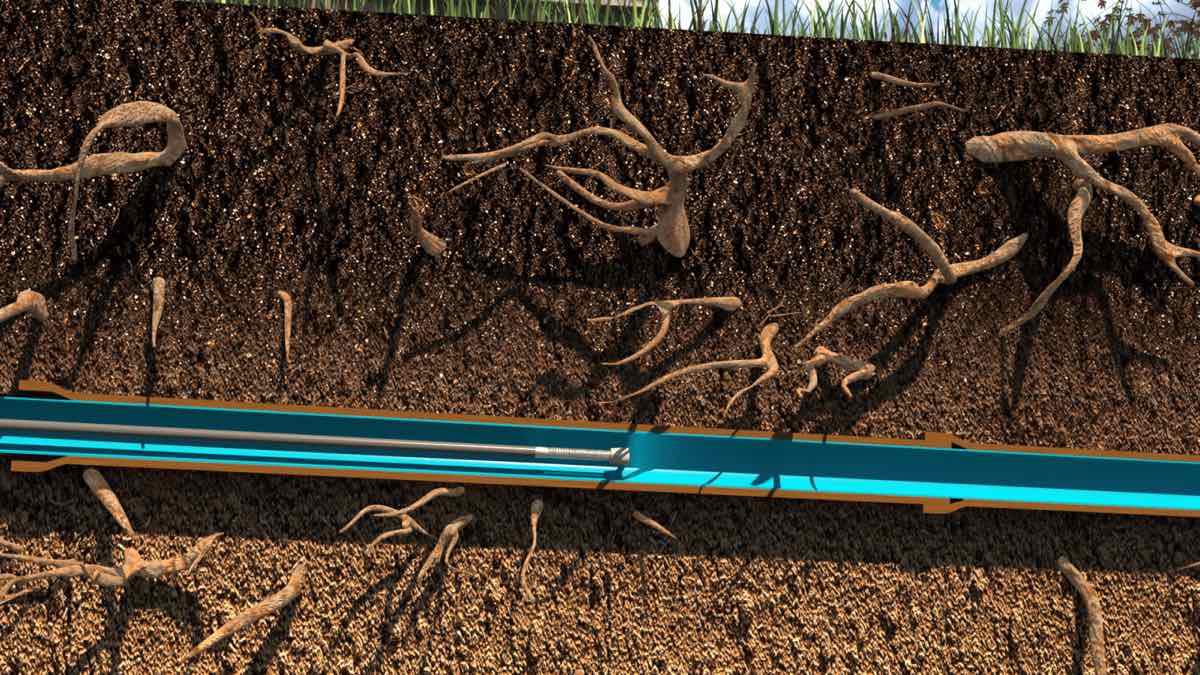
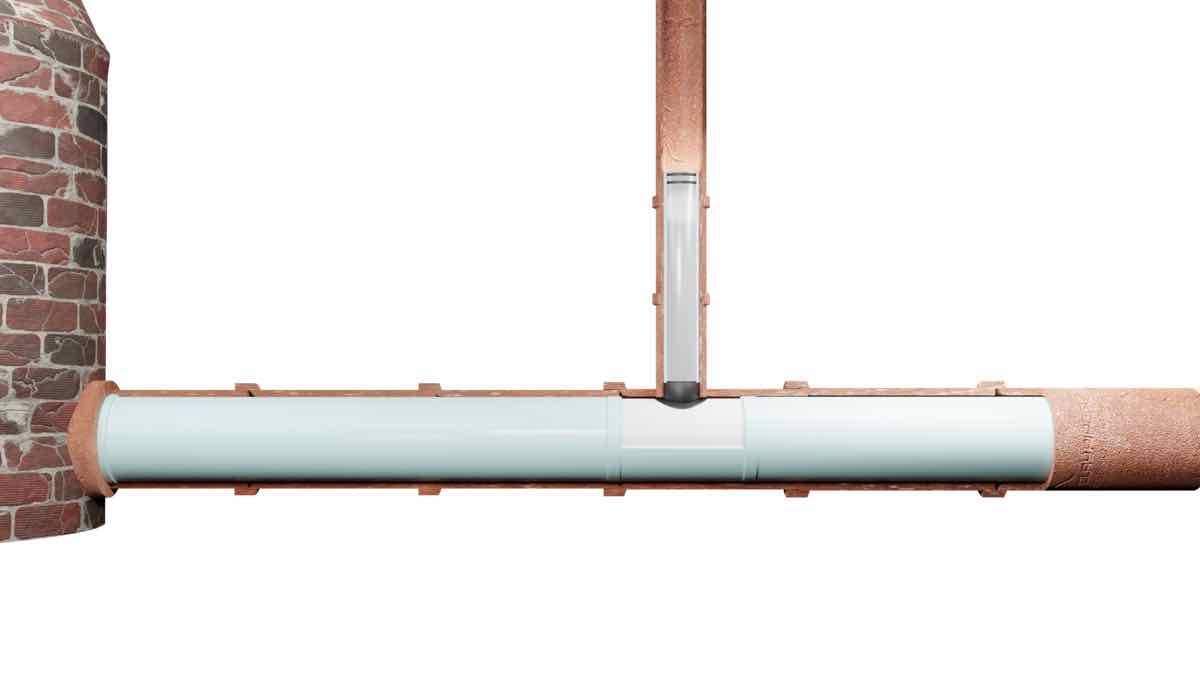
Everyone nods along at “we line it from the inside,” and no two people picture the same thing. So this is the whole sequence, in order. The cutaway illustrations below come from the manufacturer of the UV lining system we run, because no camera can show you the inside and the outside of a buried pipe at the same time. They are drawings. The steps are the real ones.
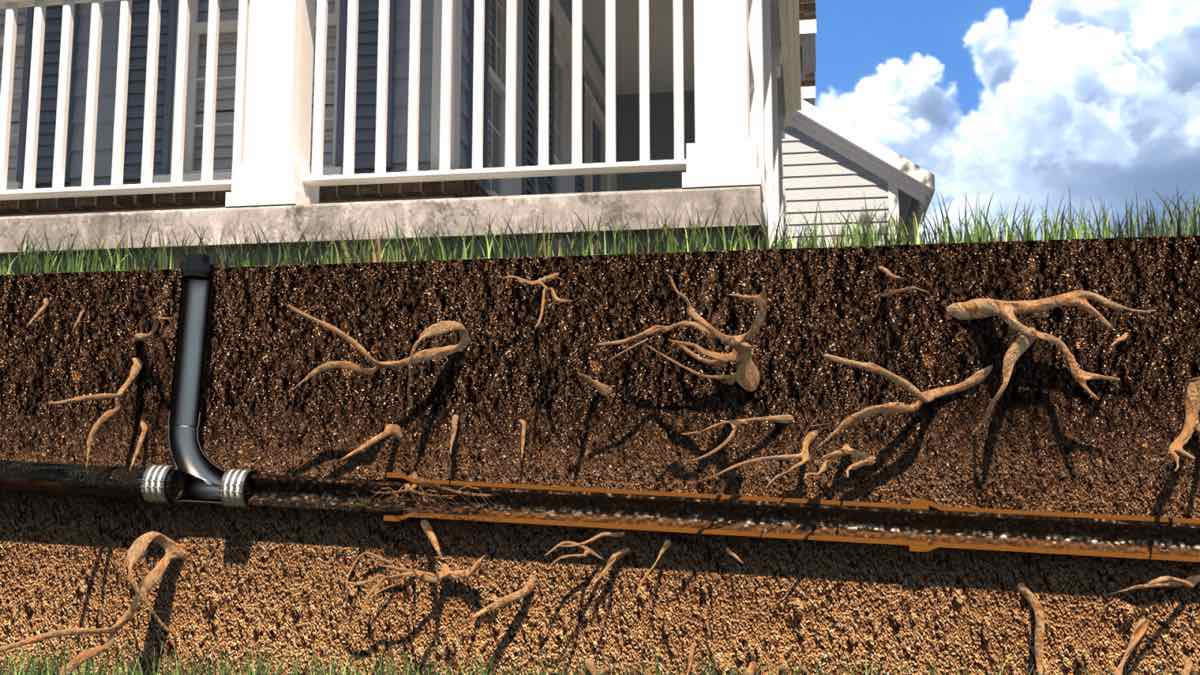
1. The camera goes in, and the fault gets marked on the grass
In through the cleanout, down the lateral, out toward the main, with you watching the screen. The camera head carries a transmitter, so before it comes back out the fault is located from the surface and marked with a flag or a dot of paint. Everything after this is work on a known defect in a known spot, which is the only way any of the rest of it gets priced honestly.
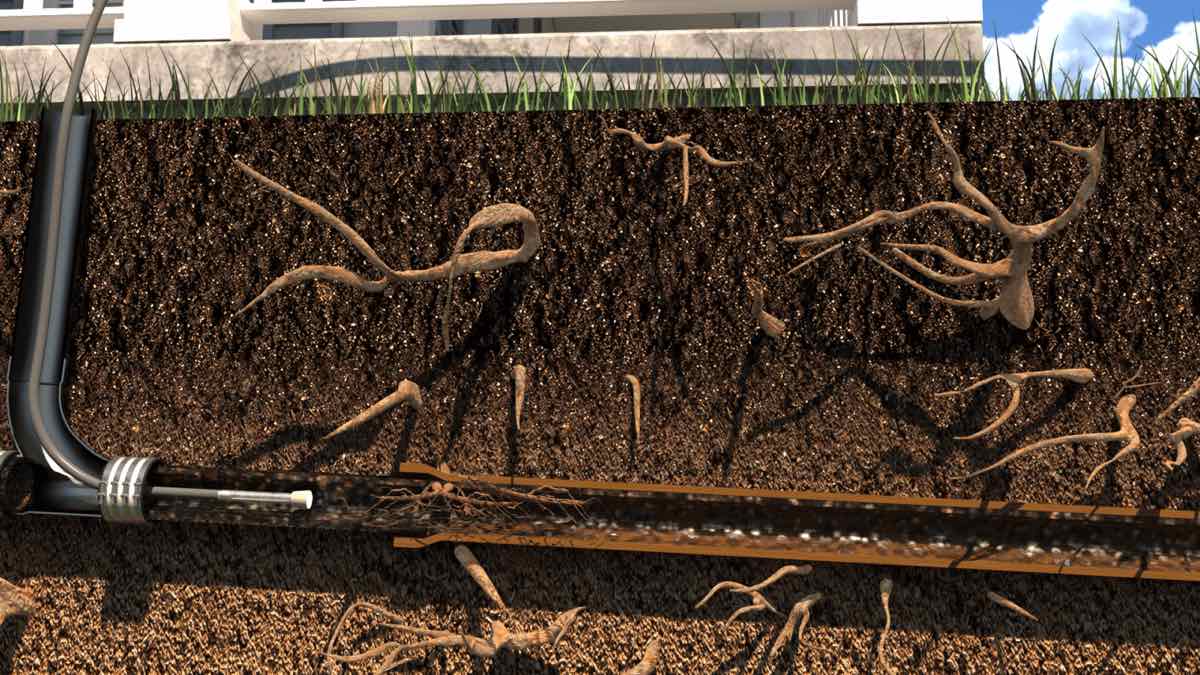
2. The roots come out
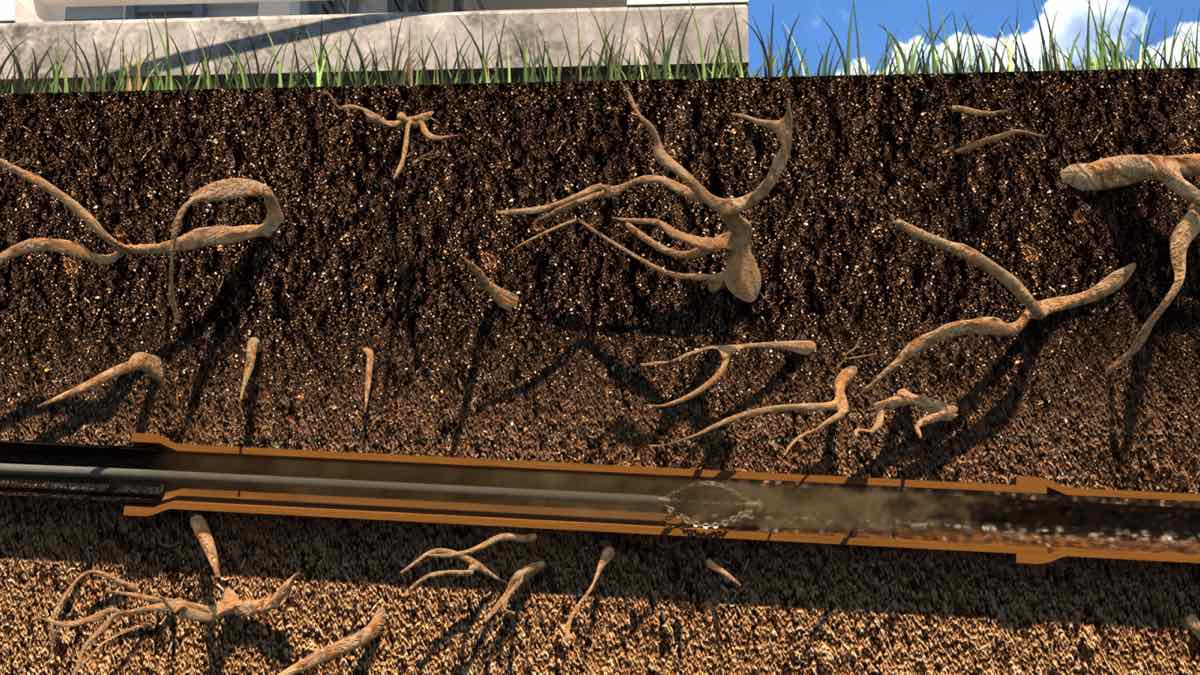
A chain cutter spins down the line and takes the roots back to the pipe wall, along with the scale and hardened grease behind them. This isn’t the same operation as a snake, which bores a channel through the middle of the mass and leaves the walls furred. Lining needs bare host pipe, all the way around.
3. The line gets washed
A jetter then flushes out everything the cutter knocked loose. Resin bonds to a clean pipe wall and it doesn’t bond to a dirty one, so this is the step that decides whether the liner behaves like pipe in ten years. It’s also the first place a lining quote gets cheap.
4. The liner goes in and the light comes on
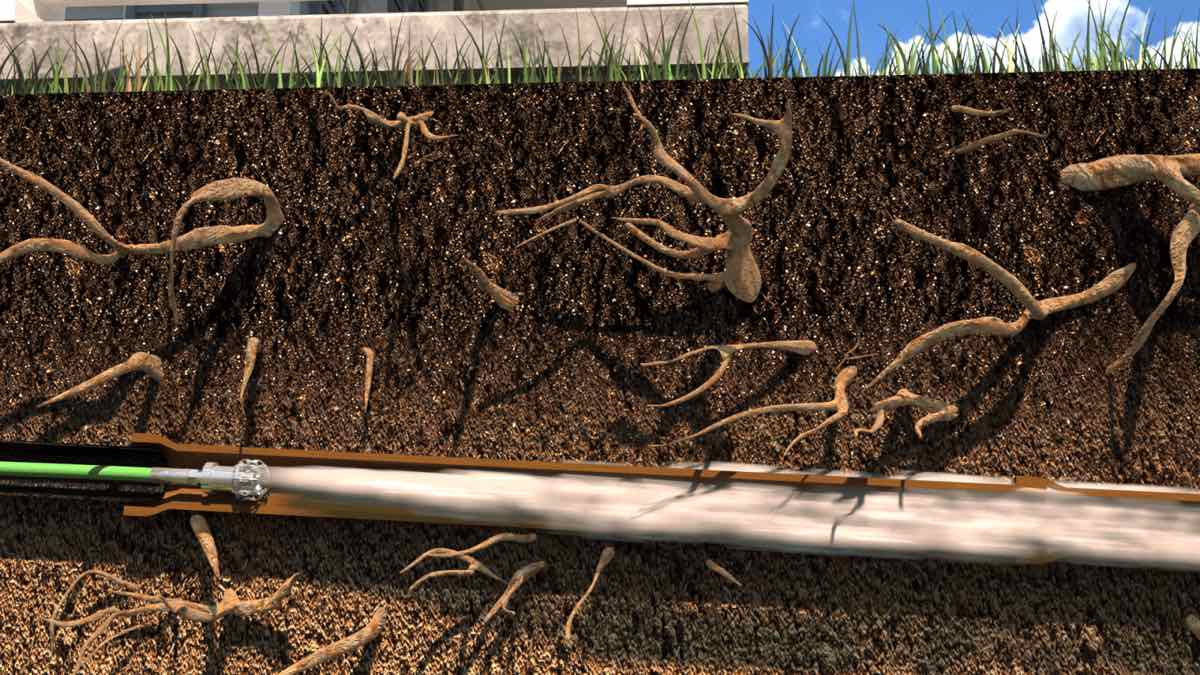
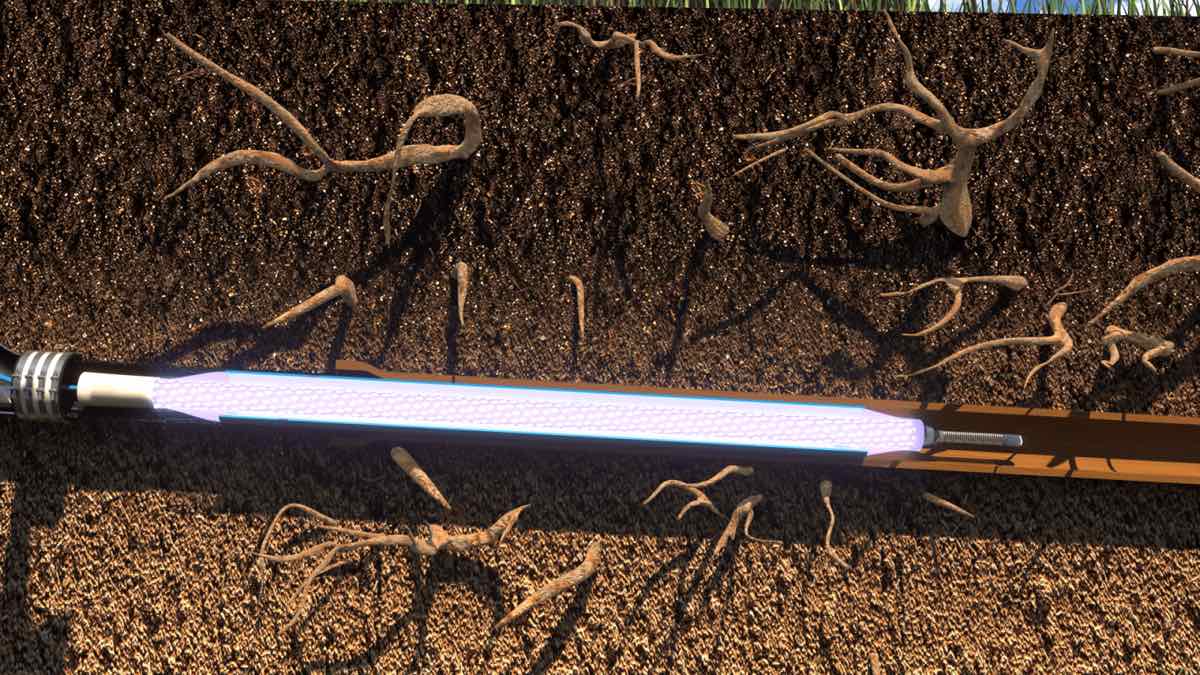
The liner is a fiberglass sleeve that arrived on the truck already saturated with resin, so nothing gets mixed in your driveway. It rides in on a packer, a flexible tube with a silicone bladder inside it. Air inflates the bladder, which presses the liner hard against the old pipe all the way around, and a train of LED lights inside the packer cures the resin with ultraviolet. Five to fifteen minutes, depending on how long and how wide the repair is. Then the bladder deflates, the packer comes back out, and the liner stays.
The leading edge of the packer can carry a radio transmitter as well, so where it is sitting underground gets tracked rather than assumed before anybody turns the light on.
5. The camera goes back in
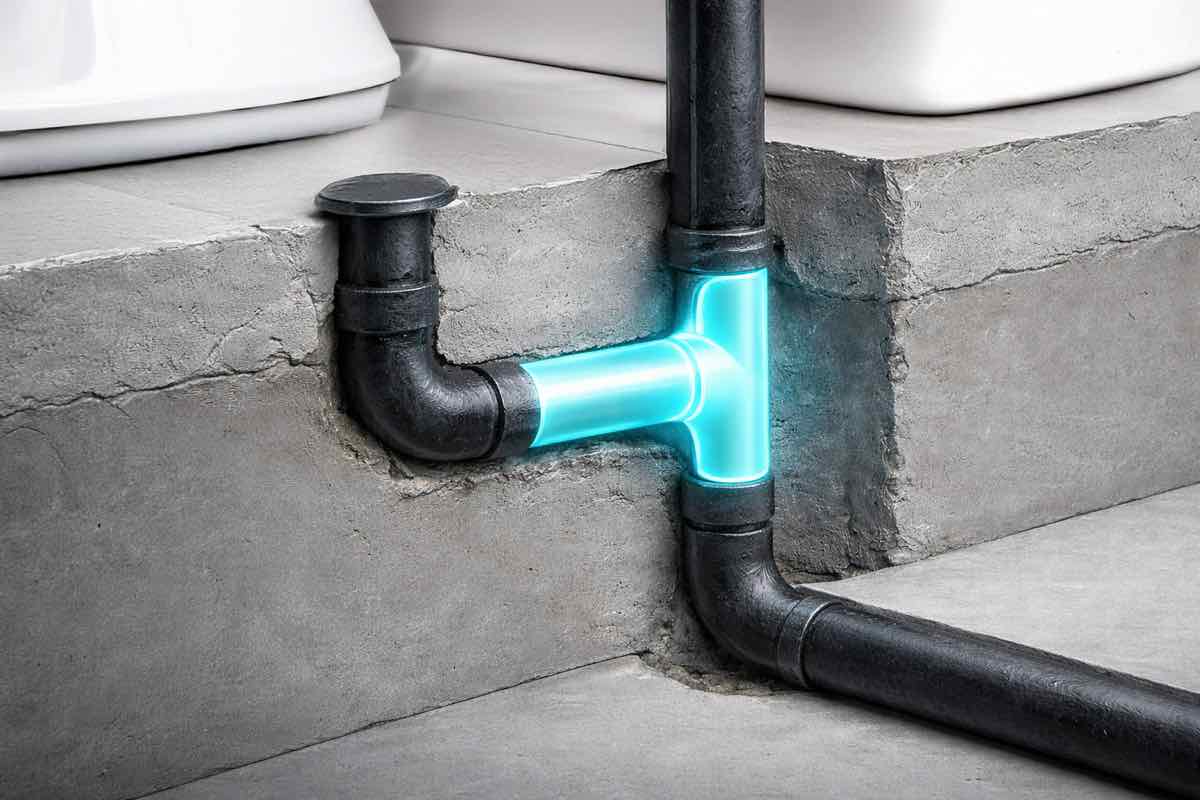
Same camera, same line, and this time you’re looking at a smooth continuous wall where the joint used to be. Ask for that footage and keep the file. It’s what you hand an agent in four years when a buyer’s inspector starts asking about the sewer.
What you’re actually left with
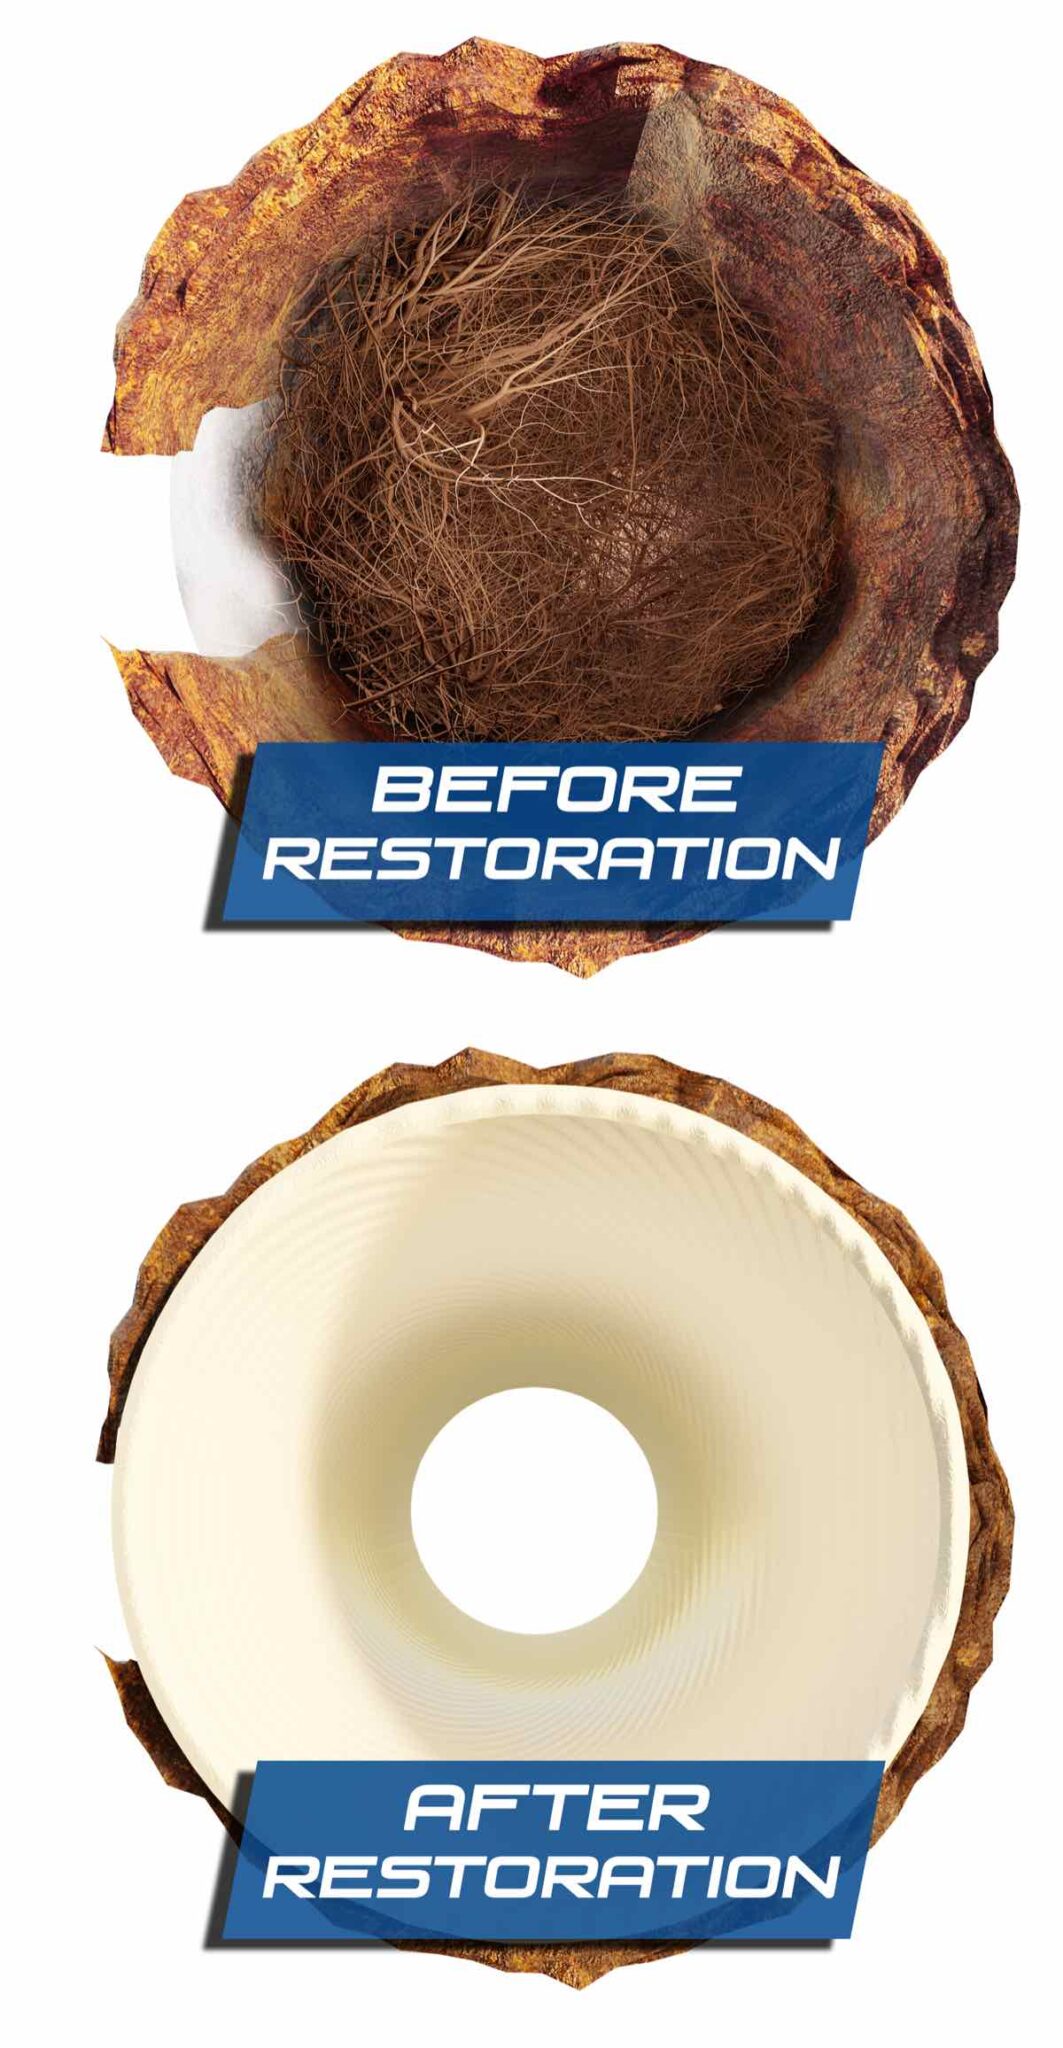
A pipe inside your pipe, bonded to it, with no joints along the lined section for anything to get in through. The old line becomes the form the new one was cast in, which is why the failing pipe is allowed to go on failing around it.
A patch, or the whole run
Two jobs get called trenchless and they aren’t the same size of decision.
A spot repair lines a length of pipe around one fault. The packers come in 5, 10 and 20-foot repair lengths, so what sets the price is how much bad pipe the camera found, not how long your lateral happens to be. One defect, one visit, and the rest of the line is left alone because the rest of the line is fine.
A full-length liner re-lines the whole lateral in one continuous piece, house to main, up to about 150 feet, and it will navigate 45 and 90-degree bends on the way. This is the answer when the camera shows the pipe is failing everywhere rather than somewhere, which is the usual verdict on 1960s clay that is shedding at every joint.
Three things about lining that tend to surprise people:
- It isn’t only for the pipe to the street. There’s a 2 and 3-inch version of the same system for branch drains, and that packer is flexible enough to go around bends and through a p-trap. The kitchen line under a slab is a candidate, not just the main lateral.
- The pipe can change size mid-run. Liner comes in 3, 4, 6 and 8-inch with transitional flex, so a 4-inch that opens up to 6-inch nearer the main doesn’t end the conversation.
- The old material barely matters. Clay, cast iron, Orangeburg, PVC. What matters is whether the pipe is still holding its shape.
What lining is not for: your drinking water
Worth drawing a hard line here, because the question comes up on nearly every one of these jobs. Everything above is about the pipes that carry water away from you. Sewer, drains, waste. That’s what these resin systems are built for, and it’s how the manufacturer describes its own business: drain, sewer and stormwater.
The pipe bringing drinking water in is a different animal with a different rulebook, and the rulebook isn’t a figure of speech. Virginia’s plumbing code requires water service and water distribution pipe to conform to NSF 61, the health-effects standard for anything that touches drinking water, and that standard covers linings and coatings by name. A sewer liner isn’t certified to it. Relining a pressurized water line is a real thing, but it’s a separate practice with its own standard and its own products, and it isn’t what’s on this page. We’re not putting a sewer liner in your supply line.
So when the failing pipe is on the water side, the answer is new pipe rather than a liner. We generally put copper back. It’s a known quantity in the ground here, it takes the pressure and the heat, and a plumber opening that wall in thirty years will know exactly what they’re looking at. PEX has real uses and we’ll say so when your run is one of them.
Which one is right depends on the pipe you’ve actually got: what it’s made of now, how it’s routed, how far it runs, what’s sitting on top of it. That’s a conversation to have standing in front of it. Ask us on site and we’ll tell you what we’d put in our own house, and if the honest answer is that your water line has years left in it, you’ll get that too. Our plumbing page lists what that side of the work runs.
Hot water, steam or light, and why you should ask which
A liner is only as good as its cure, and there are three ways to do it. Hot water circulated through the liner, steam, or ultraviolet light. All three are legitimate and all three are in the standard. They aren’t controlled by the same things, which is the part worth knowing when the work is happening in February in a yard in Northern Virginia.
NASSCO, the trade association that writes the installation specification most of this work is bought under, spells the difference out. On a hot water or steam cure the contractor has to account for the wall thickness and “the existing ground conditions with regard to temperature, moisture level, and thermal conductivity of soil.” On a UV cure the same specification governs light output, how fast the light train travels, and the pressure and temperature logged inside the liner. Ground temperature is written into one and not the other.
We run the UV version. The manufacturer’s claim for its resin is that it’s non-thermal and temperature-stable, so casting times come out consistent whatever the weather is doing above or below ground. That’s their claim and we’ll name it as theirs, but the underlying difference is real: a thermal cure is being managed against the ground it’s buried in, and a light cure is being managed against the light.
Two things follow that you’ll actually notice:
- Nothing gets mixed at your house. The liner shows up pre-impregnated, so there’s no wet-out table on the driveway and no chance of a bad batch going into your line.
- No solvent smell indoors. The standard resins are non-VOC, which matters when the pipe being lined runs under a finished basement floor.
Where the liner goes in, and whether anything gets dug at all
Trenchless doesn’t always mean nothing gets opened, and you should know which version you’re buying before you sign.
A liner has to enter the pipe somewhere, and that somewhere is a cleanout: the capped fitting, usually just outside the foundation or in the basement floor, that exists so a drain can be worked on without pulling a toilet. The plumbing code Virginia builds to requires one where the building drain meets the building sewer, or within ten feet of that junction, plus one every hundred feet along the run. So most houses have one. If yours does and it’s in a usable spot, the whole job goes through it and nobody breaks ground.
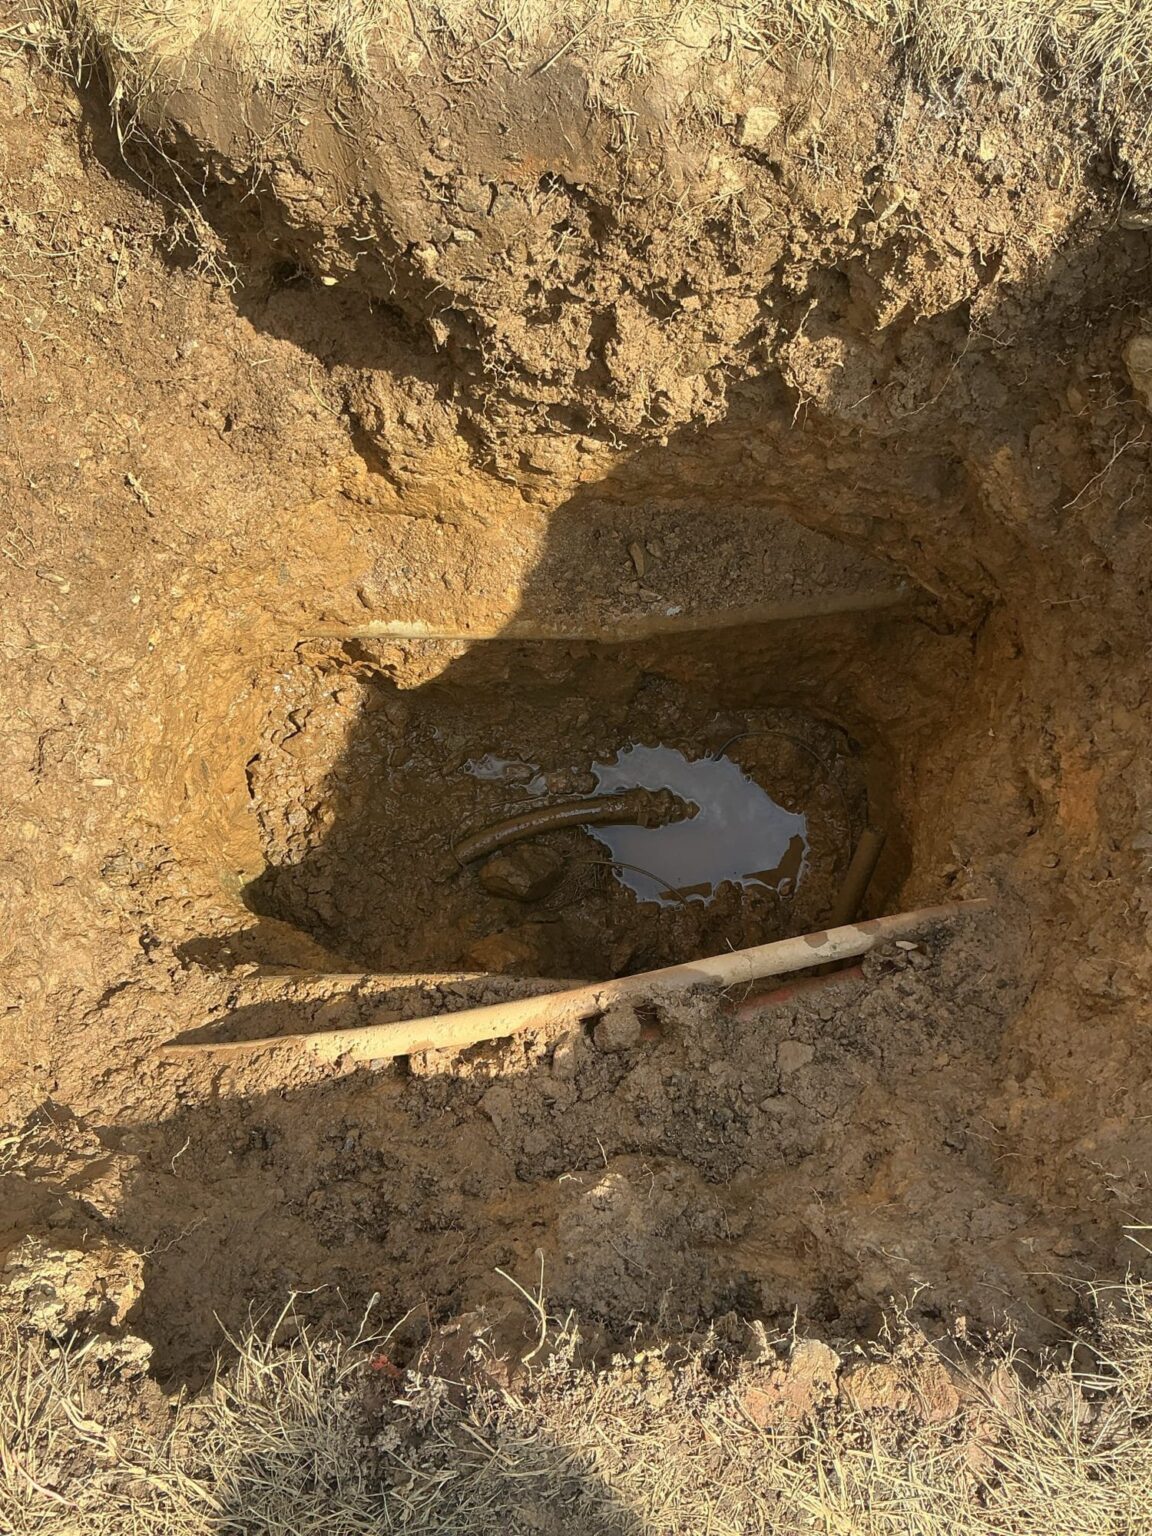
If there is no cleanout, or the only one is in the wrong place, an access point has to be made. That’s one opening at one spot, not a trench running the length of the yard, and it’s the difference between a lawn with a patch and a lawn with a scar. So ask two questions before you sign anything: where is the access going to be, and what does that spot look like when you leave.
When lining is the wrong answer
Anybody who tells you trenchless is always better is selling, not diagnosing. A liner needs a host pipe to line. It isn’t the answer when:
- The pipe has collapsed. There’s nothing left to line through. That’s a dig, or a burst-and-pull.
- There’s a real belly. A sewer lateral runs on gravity and nothing else. Virginia builds to the International Plumbing Code, which sets the minimum fall for a 4-inch building sewer at an eighth of an inch per foot, and a belly is a stretch that has settled below that line. Lining it gives you a smooth, watertight, still-sagging pipe, because a liner follows the pipe it’s cast inside and can’t change its grade. Fixing the fall means re-laying the pipe, which means opening the ground.
- The line is badly off-grade or the wrong size. A liner follows the existing path and slightly reduces the diameter. If the geometry is the problem, the geometry has to change.
- The failure is at the connection to the main. That end frequently needs excavation regardless, and it may not be your pipe at all.
On a good day the camera shows a clean crack in sound pipe and you save several thousand dollars. On a bad day it shows a collapse and we tell you so. That’s the same camera either way, which is exactly why it goes in first.
What to ask anyone who quotes you a liner
Lining is an excellent repair done properly and a waste of money done badly, and once it’s buried you can’t tell which one you bought. Six questions, and any competent contractor will be glad you asked them:
- Can I see the before footage, and do I get the after footage? Both, on video, is the floor. One pass before the money is spent and one after.
- How much of the run are you lining, and why that much? A patch over a six-foot defect and a full-length liner are different orders of money. The footage should be what decides it, and you should be shown why.
- How is the pipe getting cleaned first? If the answer is a cable and nothing else, the liner is going down on top of scale and grease.
- What is the liner made of, and what standard is it built to? ASTM F1216 is the standard practice for this repair, and ASTM F2019 is the one written specifically for glass-fiber liners pulled into place and cured with UV light, which is what we run. A real answer names something. “It’s a liner” is not an answer.
- Is the cure UV, steam or ambient? All three are legitimate. They aren’t the same job to run, and the one you’re buying should be on the quote.
- What is the warranty, and is it on paper? The design life is 50 years. What you actually own is whatever the paper says.
Then the question that tells you the most, asked in the other direction: is there any scenario here where you would tell me to dig instead? Anyone who can’t name one is selling a product, not reading your pipe.
Why we won’t quote a replacement price without the camera
Digging and replacing a sewer line in Northern Virginia generally runs $7,500 to $9,000, and that range is worth knowing. What it isn’t is a quote. Yours runs under a driveway and the neighbor’s ran under grass, one is four feet down and the other is eight, and those are different days and different machines. Anyone who prices a sewer replacement over the phone is pricing the average house, not yours.
So: that’s the neighborhood. Where in it you land depends on what the camera finds and on the things below.
What actually moves the number
Length and depth. Every foot is trench, and every foot of depth multiplies it. Four feet down and eight feet down are different machines and different days.
What’s sitting on top of it. Lawn is the cheap case. A driveway, a patio, a retaining wall, a finished basement slab or a tree you want to keep all add cost, and some of them add more than the pipe does. This is exactly where trenchless earns its premium: the lining cost is flat whether the line runs under grass or under your new pavers.
How much of it has failed. One located fault in sound pipe is a spot repair. Six failures along the run is a full-length job. Again, the camera.
Access. An existing cleanout in the right place saves real money. If there isn’t one, putting one in is part of the job.
Permits and inspection. Sewer work is permitted work here. That isn’t a line item to negotiate away, and it means an inspector signs off on the result, which is protection for you and not for us.
What your pipe probably is, by the year the house went up
The camera settles this in about a minute, but the build year gets you most of the way there, and the material decides which of the four options is even on the table.
- Before about 1940: vitrified clay. Fired clay, in short sections. Municipal utilities put clay’s service life at 50 to 60 years, and the body of the pipe often outlasts that. The joints are the problem. They are the doorway roots come through, and clay is brittle enough that it cracks rather than deforms.
- Roughly 1940 to 1980: cast iron. Estimates vary more than you would expect, from about 30 to 60 years depending on which utility you ask, and the national cost guides claim considerably longer still. It fails from the inside: wastewater etches a channel along the bottom of the pipe, thins the wall, and eventually erodes through. The escaping water then washes out the bedding underneath, which is how a cast iron line grows a belly and then collapses.
- Late 1940s to the early 1970s: Orangeburg. Compressed wood fiber impregnated with coal tar pitch. Advertised at a 50-year life when it went in, which means every piece still in the ground is past it. It deforms under sustained load and goes oval before it fails.
- Roughly 1980 onward: PVC or ABS. 50 to 100 years, glued joints, no root doorway. When newer pipe fails it’s almost always a specific event rather than age.
The Orangeburg warning is the one to actually act on. If your line is Orangeburg, running a mechanical cutter down it isn’t a neutral act. Municipal guidance is blunt about this: when roots intrude into Orangeburg and a rooter goes in after them, the machine tears out pieces of the pipe while it cleans, which brings on the collapse. So the sequence matters. Camera first, then decide. Somebody snaking an Orangeburg line sight-unseen can turn a repair into a replacement in one visit.
The signs you’re heading here
Sewer lines almost never fail without warning. The warnings just get cleared and forgotten.
- The main has backed up more than once in a year, or more than twice ever.
- Several fixtures gurgle or back up together, worst on the lowest floor.
- One stripe of the lawn is greener, softer or wetter than the rest.
- There’s a smell outside, near the front of the house.
- The house went up before 1990 and there are mature trees between it and the street.
- A plumber told you the cable caught at the same distance every single time.
Two or more of those, and the right next purchase is a camera, not another clearing. Repeat clearings on a failing line are the most expensive way to buy a replacement: you pay for the clearings and then you pay for the pipe anyway.
Older neighborhoods, and why we get these calls
The pattern in Northern Virginia isn’t subtle. Sewer problems cluster where mature trees meet mid-century pipe, and that describes a lot of McLean, older Vienna, Falls Church and the inside-the-Beltway parts of Fairfax County. Big oaks, houses built when clay and cast iron were standard, and laterals that have been quietly at the end of their service life for a decade.
Newer Ashburn, Brambleton and South Riding are a different story. Those laterals are PVC and they’re young. When they fail it’s usually a specific event, construction damage, a bad joint, a crushed section, rather than age, and a located spot repair often ends the whole conversation.
Either way the diagnosis is the same and it starts with the camera.
Who actually owns the pipe, and it isn’t the same rule everywhere
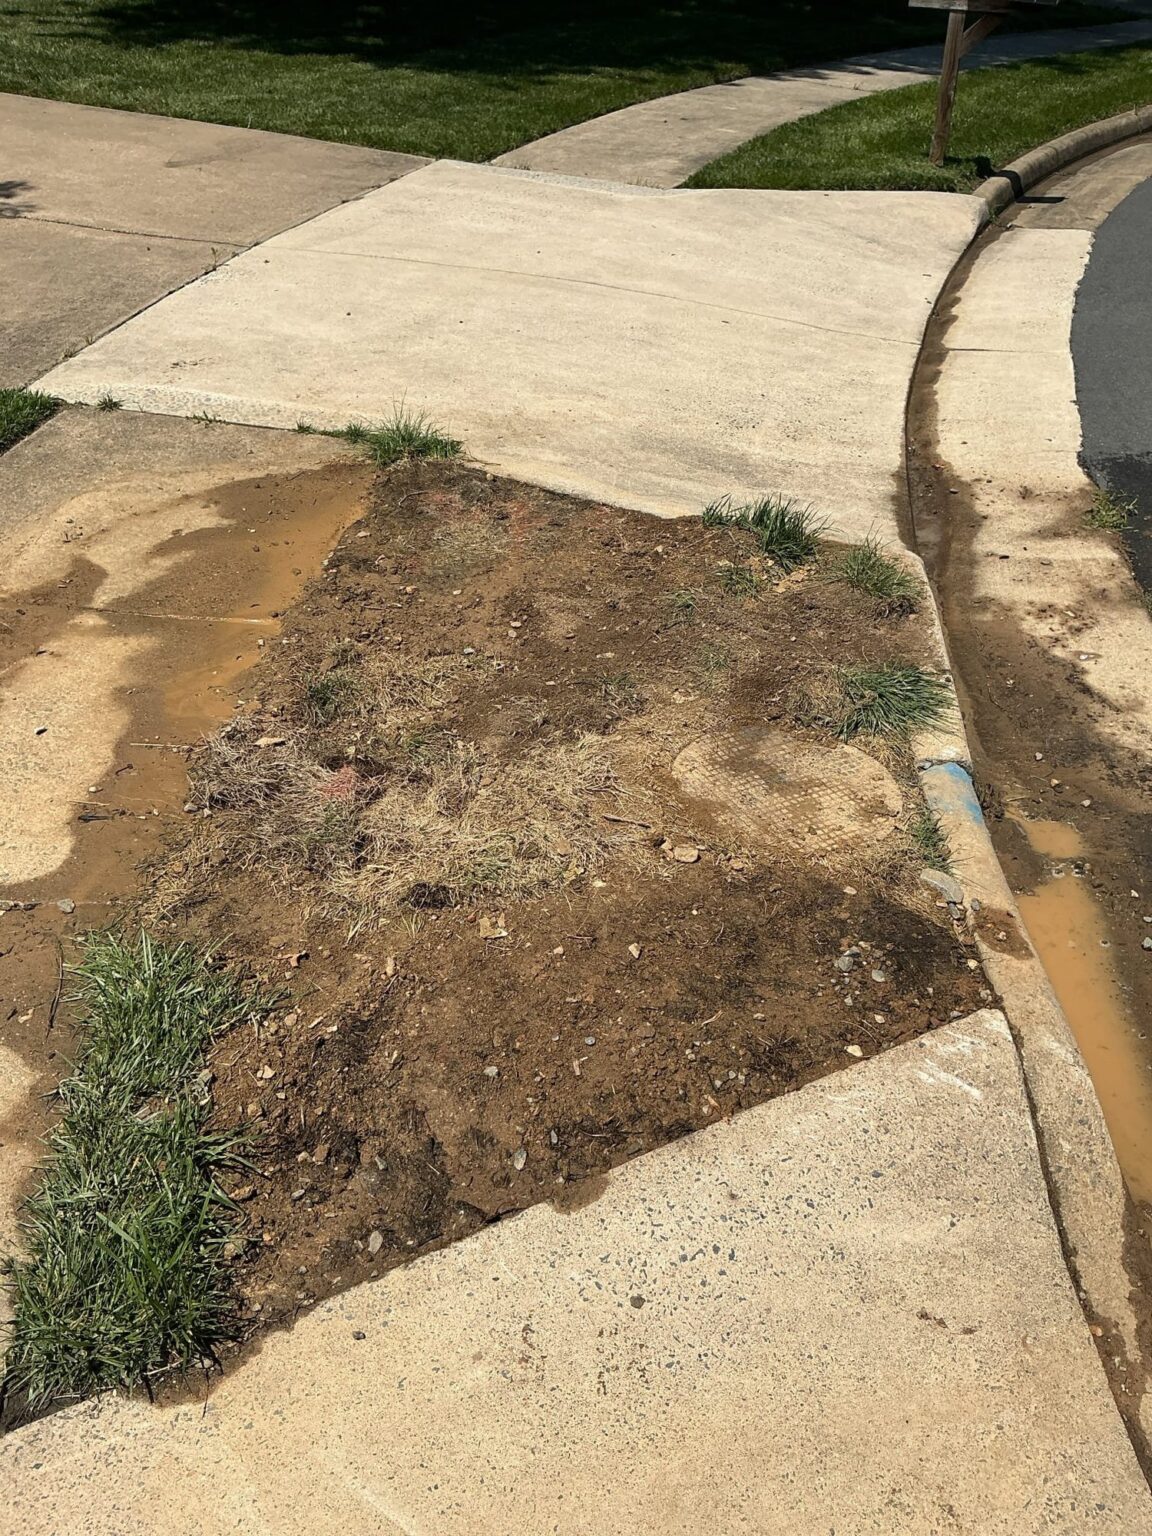
People assume the county owns the sewer once it leaves the house. Mostly it doesn’t. In most of Northern Virginia the pipe from your foundation all the way to the connection at the public main is yours, including the connection itself. But the rule genuinely changes at the jurisdiction line, and the differences are worth real money.
- Fairfax County. Yours from the building to the main, connection included. The county says plainly that the lateral is considered part of the home and won’t locate or mark it for you.
- Arlington County. The clearest wording in the region. County Code says service laterals aren’t part of the sanitary sewage system and are owned and maintained by the owner of the premises served.
- Loudoun Water. Yours to maintain, with a twist worth knowing. Where the building sewer sits in the public right of way, Loudoun Water takes sole control of correcting the work, and can still bill you for repairs caused by faulty materials or workmanship. You own the cost without owning the decision.
- City of Fairfax. Yours to the main, but the city runs a lateral repair reimbursement program, and this is the one people should know about.
- Town of Herndon. Narrower than its neighbors, and split in a way worth reading twice. Town code makes a single-family homeowner responsible for the structural condition of the lateral from the house to the right of way line, and hands the town the structural repair from there to the main, paid for by a fee of fifty cents a quarter on the sewer bill. But clearing a blockage stays yours over the whole run, right of way included. So in Herndon a collapsed pipe under the street may be the town’s problem while a clog in the same length of pipe is still yours.
- City of Alexandria. Split by the date the lateral went in, before or after July 1, 1955, and the city’s published wording is genuinely ambiguous about who covers the curb-to-main stretch on the older ones. If your house predates 1955, call Alexandria T&ES and get the answer in writing before you pay for anything.
- City of Falls Church. The city is explicit that it doesn’t own or maintain private laterals, on public or private property. Their own sewer page tells residents a lateral repair is often the most expensive emergency repair a homeowner faces and typically runs more than $10,000.
The City of Fairfax reimbursement almost nobody claims
If your home is inside the City of Fairfax, the city refunds part of a lateral repair under a program its council approved in 2017:
- Repair on your private property only: 25% back, up to $3,250.
- Repair in the right of way only: 25% back, up to $3,250.
- Complete lateral, house to the mainline in the right of way: 75% back, up to $6,500.
On an $8,000 job that’s real money, and it’s the kind of thing that quietly doesn’t come up when a contractor is quoting. City of Fairfax address, ask about it. The application goes through the city’s permit hub and you pick your own contractor.
Permits, and what a to-code job includes
Sewer work is permitted work in every Northern Virginia jurisdiction, and the permit is the contractor’s job to pull, not yours. The permits themselves aren’t the expensive part:
- Fairfax County charges $77.70 for a sewer service permit, new, replacement or repair. The catch is that most residential streets here are VDOT-maintained, so if the work reaches into the street you need a state permit on top of the county plumbing permit. Two permits, two schedules, and it shows up in the quote.
- Loudoun County charges $70 for a sewer line permit, new or replacement, through Building and Development rather than through Loudoun Water.
- City of Alexandria lists a sewer lateral permit at $125 per connection plus $250 per block for the excavation, and adds a surcharge for cutting a street paved in the last five years.
- Arlington County requires a contractor to carry a $5,000 street permit bond before cutting a street surface for a sewer connection, which is one reason not every plumber will take that part of the job.
Two code requirements are worth knowing because they’re where corner-cutting shows up later:
- It gets inspected before it gets buried. The building code requires plumbing to be inspected before concealment. A trench that got backfilled before an inspector saw it’s a problem you inherit, and it surfaces at closing.
- Virginia requires a tracer wire. Virginia amends the plumbing code to require nonmetallic sewer piping running to a public system to be locatable, using an insulated copper tracer wire of at least 18 AWG, run within 12 inches of the pipe and brought up above grade where someone can reach it. It costs almost nothing on installation day and it’s the difference between the next person locating your line in ten minutes or guessing with a shovel. Out-of-area contractors miss it regularly.
If a quote comes in noticeably cheap, these are the line items to ask about before you assume you found a deal.
Estimated Costs for Sewer Line Repair in Northern Virginia
You have probably already read three of these. Here is how they line up against what actually happens here.
Angi publishes a Washington DC metro figure, and Northern Virginia ZIP codes resolve to it. Put our own Chantilly ZIP into their tool and you get an average of $4,439, a normal range of $2,341 to $6,647, and $50 to $400 per linear foot. HomeGuide, working nationally, puts a 40-foot replacement at $2,000 to $10,000. Angi’s separate trenchless guide puts a trenchless project at $1,900 to $6,000, averaging $2,900, with lining at roughly $90 to $250 per foot.
Those are reasonable ranges and we aren’t going to argue with them. Two honest notes, though.
Our range sits above that local band. $7,500 to $9,000 against Angi’s $2,341 to $6,647. We’re not going to explain that away. A national average is built partly from short fixes in easy ground. If you’re budgeting, budget for the possibility that yours is a real one, and be pleased if the camera says otherwise.
The permit number in those guides is simply wrong for here. Angi’s DC metro page tells homeowners to plan on spending $1,000 or more on sewer line replacement permits. The actual published fee schedules say otherwise. Fairfax County charges $77.70 for a sewer service permit. Loudoun County charges $70. Alexandria lists $125 per connection plus $250 per block for the excavation. If a contractor is quoting you four figures of permit cost, ask which permit and which jurisdiction, and then go look at the fee schedule yourself. It’s a public document.
The place a permit genuinely does get expensive here is the street. Most residential streets in Fairfax County are VDOT-maintained, so work reaching into the roadway needs a state permit on top of the county plumbing permit, and in Arlington a contractor has to carry a $5,000 bond before cutting a street surface for a sewer connection. That’s a real cost driver, and it’s a completely different thing from the permit fee.
If you’re buying or selling
A standard home inspection doesn’t include a sewer camera. That isn’t your inspector cutting corners, it’s the standard they work to: InterNACHI’s Standards of Practice don’t require a sewer scope, and buried lines and private waste disposal sit outside what an inspector has to look at. Most will run one as an add-on if you ask. In a neighborhood of older homes with big trees, that add-on is the single most expensive thing a buyer’s inspection leaves out, and the cost of finding out afterward isn’t in the same universe as the cost of finding out first.
Selling: scope the line before you list. Then you control that conversation instead of renegotiating it under a deadline with the buyer’s contractor holding the footage.
Questions we get asked
How much does trenchless sewer repair cost compared to digging?
The rule of thumb is that lining runs somewhere around half of what the same fault costs to excavate, and the gap widens the worse the ground conditions are. A line under an open lawn narrows it. A line under a driveway, a patio or a finished slab widens it a lot, because the dig price has to include putting all of that back.
How long does a sewer liner last?
Fifty years, by design. ASTM F1216 gives cured-in-place pipe a 50-year stand-alone design life, and the EPA funded a study that pulled real liners out of municipal sewers after 21 to 25 years and found them in excellent condition. For context, the clay and cast iron those liners go inside were built for roughly 40 years, which is exactly why so many Northern Virginia laterals are giving up right now.
Can you line a pipe that has tree roots in it?
Yes, and it’s one of the best cases for lining. The roots get cut out and the line gets cleaned back to bare wall, then the liner seals the joint they were coming in through, so there’s no longer a way in.
Worth understanding what actually happened, because most people have the story backwards. Roots can’t crack a sewer pipe. Warm water moving through the line pushes water vapor out through cracks and loose joints into cold soil, roots follow that vapor trail to its source, and then they enter through the opening that was already there. As an urban forester with N.C. Cooperative Extension puts it, if you’ve tree roots in your sewer pipe, it means you had a leaking sewer pipe before the roots got there. The tree didn’t break your line. It found it.
This isn’t a fringe problem. A review in the Journal of Infrastructure Systems, published through the USDA Forest Service, reports that root intrusion causes more than half of all sewer blockages.
Two practical consequences. Roots reach somewhere between two and two and a half times the height of the tree, so the oak that looks nowhere near your lateral very likely is. Seattle’s utility draws the obvious conclusion out loud: because roots run that far, taking down the tree above the line won’t usually fix a root problem. And a root problem is a symptom, so clearing roots without ever asking how they got in is how people end up buying the same visit every eighteen months.
Can you line my water supply line instead of digging it up?
Not with this system. The UV resin on this page is made for drains and sewers, the pipes carrying water away from the house. A drinking water line runs under pressure, and everything in contact with the water has to be certified safe for it, which a sewer liner isn’t. When a water service line or a supply pipe inside the house fails, the fix is new pipe, and we generally put copper back. Ask on site and we’ll tell you which material your particular run should get.
Does trenchless lining work on Orangeburg pipe?
Sometimes, and it comes down to shape. Orangeburg is wood pulp and tar, and it fails by deforming: round goes oval, then oval goes flat. A liner needs a host pipe that is still holding its shape, so an egg-shaped or collapsed run has to come up out of the ground. What nobody should do is run a cutter down an Orangeburg line to see whether it cleans up, because the tool tears pieces out of the pipe as it goes and can bring on the collapse it was sent to look at. On that pipe in particular, camera first.
How much narrower is the pipe after lining?
A little, and the trade treats that as a number it has to answer for. The liner is a wall thickness added inside the pipe you already have, so the opening comes in by about that much all the way around. What you get back is a smooth continuous surface in place of corrosion, scale and open joints. NASSCO’s installation specification makes it a requirement rather than a hope: the finished liner has to carry at least the full flow capacity the original pipe had before the work. A line that was undersized to begin with is a different conversation, and it’s one of the cases where we’ll tell you to replace instead of line.
Does anything get dug up for a trenchless repair?
Usually nothing. The work goes in through an existing cleanout and the pipe gets repaired from the inside, which is the entire point of the method. The exception is a house with no usable cleanout, where one access point is opened so the equipment can get in. That’s a hole in one place, not a trench down the yard. Ask where it will be before the work starts.
Is a liner as strong as new pipe?
It’s a pipe in its own right, not a coating on the old one. ASTM F1216 is written around a liner that carries the load on its own, which is what a 50-year design life inside a host pipe that is already failing actually means. The old pipe is allowed to keep deteriorating around it, because structurally it’s no longer the thing holding your sewer up.
How long does the work take?
A spot repair is usually a single visit. The cure itself is 5 to 15 minutes. A full-length lining is typically a day. An excavation is several days once you count the permit, the dig, the inspection and putting the ground back.
Do I need a permit, and does lining change that?
Sewer work is permitted work in Northern Virginia jurisdictions and the permit is the contractor’s job to pull. If a quote is cheap because it skips the permit, you’re buying an unpermitted repair on the pipe that carries your house’s waste, and it becomes your problem at closing.
Lining does not get you out of it. Prince William Water is the most explicit about it of anyone here: its standards manual requires a Lateral Repair or Replacement Permit before work on a lateral outside the building, and says that work “shall only be performed by the Applicant with a permit and inspection.” Loudoun Water sends you to a licensed plumber, wants a lateral inspection request filed, and will not let an excavation be backfilled until its inspector has looked in it.
One thing worth saying plainly, because contractors on both sides of the argument will tell you otherwise: no water utility in Northern Virginia publishes a standard that approves lining a private lateral, and none publishes one that forbids it either. What they publish is who owns the pipe, who has to be called, and who has to see the work. Those apply the same whether the fix is a liner or a trench.
Is the sewer line even mine?
Usually yes, and in most of Northern Virginia you own it all the way to the main. But it isn’t the same rule everywhere, and in one city you may get a quarter to three quarters of the bill back. See the jurisdiction section above before you pay for anything.
Will homeowners insurance cover it?
Usually not for the pipe itself. Standard policies treat a failing sewer lateral as wear and maintenance, and many will cover the resulting water damage while excluding the repair that caused it. Some carriers sell a service-line rider for exactly this, often for a small amount a year. Worth a phone call before you need it, not after.
Is a sewer camera inspection worth paying for on its own?
If you’ve two or more of the warning signs above, yes, and it’s the cheapest decision you’ll make in this whole process. If you’re buying a house built before 1990 with mature trees out front, also yes.
On price, our $500 to $620 sits inside the national picture. HomeGuide, working from close to two thousand reported jobs, puts a sewer camera inspection at $125 to $500 with an average near $280, and $100 to $250 when it is added onto a home inspection. Angi’s headline for the same service is $995, which is an outlier against its own itemized tables. Ours runs $89 when we’re already at your house on another call, which is the cheapest version of this decision available and the one we would rather you take.
How we handle it
Camera goes in first. You watch the footage with us, we mark the fault on the ground above it, and you get quoted on the job the footage actually supports. If it’s a clearing, we’ll tell you it’s a clearing. If it can be lined, we line it and your yard stays a yard. If it genuinely needs to come out of the ground, we’ll show you why on screen before anybody picks up a shovel.
Call (703) 997-9757 or book online. If it’s backing up right now, use the emergency line, and put a towel over the lowest drain in the house until we get there.